
How To Do a Professional Facial At Home
Are you considering giving yourself an at-home facial? I’m gonna break down why you totally should, and what products I recommend in order to give yourself the clear, glowing skin you deserve, all on a budget! Of course I’m not against treating yourself to the real deal every now and then, but if there’s an option to get the results you want WITHOUT spending an arm and a leg? We are so here for it.

Why give yourself a facial at home? First of all it’s a great way to de-stress and unwind if you’re under a lot of stress! Any form of self-care is beneficial for our mental health every once in awhile, so why not kill two birds with one stone and de-stress while helping our skin look it’s best?
And look, this is coming from a girl who used to be super blessed (or naive?) and was able to get away with washing her face every day with HAND SOAP and never using sunscreen in my twenties… let me tell you it didn’t end well for me (holy crap girl, use sunscreen) and now I have a whole host of skin issues I try to keep at bay in my early thirties! Proper skincare are a GAME-CHANGER.
And TBH, we’re not gettin any younger over here. As we age, our skin loses elasticity, tone, and can develop age spots and wrinkles. Also I think we have all now come to terms with the fact that acne flare ups for sure still happen well into adulthood and sadly did not just vanish after our teen years. Us millennials are in a constant battle of fighting off the signs of aging skin, while also combating the hormonal skin issues we still have to deal with! A facial can be a great way to sort of re-set and gain back some control in this ongoing battle!
Just washing your face every day or doing one face mask does not a facial make! A facial has multiple steps and is different from your normal skincare routine! It’s definitely more time consuming and more intensive, so it’s not something you should be doing on a daily basis (experts recommend once per month at most!). Given the current pandemic and just the pure cost of a facial at a spa, DIY-ing it is really more appealing than ever! You can absolutely turn your bathroom into a mini-spa and get the full experience without the full price (and certainly without the full risk of getting sick!).

Before we hop into the tutorial- small disclaimer! Some of the links below to products I mention are affiliate links! This simply means I may earn a small commission if you click through and make a purchase through my link but at no additional cost to you! This helps me keep this blog afloat and able to create more helpful content for bargain babes like you! So thanks for stopping by the blog and I hope you thoroughly enjoy your at-home facial experience!
Ok one more small disclaimer- I am not a dermatologist, aesthetician, or any type of skincare professional. Just a girl tryna look her best and be bougie on a budget! Always check with your doctor/skincare professional of choice before trying new skincare techniques and products! And if you are pregnant, definitely check with your doctor what products are safe for you to use! I am also not adding extractions as a step to this tutorial because you can very easily damage and scar your skin by trying to perform those on your own at home! Best to leave that step up to a professional!
How To Do A Professional Facial At Home
Step #1- Set The Scene!
You are a bad-ass, hard-working woman and you deserve the FULL spa experience, even if you are doing it yourself! SO, schedule yourself some uninterrupted time and turn your bathroom into the spa! Play some soothing music, light some candles, put on a fluffy robe, make yourself some cucumber water, green tea, or get a glass of wine (why not? It’s your spa, anything goes!). And lock the damn door. Sorry kids, hubby, dog, etc. ITS ME TIME NOW.
Line up all your products that you’re going to use and have them ready to go so you’re not running back and forth or rummaging around looking for something in the middle of what’s supposed to be your relaxing experience! I’ll mention what products to use and when throughout this post, but if you just want to skip down to the list of products, click here!
Now that your space is super zen (and so is your mood), you’re ready to treat your skin to a professional-level at-home facial!

Step #2- The Double Cleanse
Double cleansing is the kickstart to the whole facial process! You’ll want to make sure your hair is totally up and out of your face for the whole facial. I love these affordable plush headbands from Amazon! But whatever your preferred method, make sure your hair is totally secured away from the face because you don’t want it getting in the way!
For cleanse number one I suggest doing with a more makeup removing / oil-based cleanser. This is a great step whether you have dry skin or oily skin, I promise! I know, fighting excess oil with more oil sounds counterintuitive, but it works! The formulas are packed with essential oils and are meant to remove unwanted excess oil while still maintaining hydration! It also helps to remove makeup, bacteria, and other things laying on the surface of your skin. Most of these you can put onto your face dry, rub it in with a circular motion, and then rinse off with warm water.
Now for the double cleanse! Cleanse number two you will choose based on your skin type! If you have more sensitive skin I would say choose a cream-based cleanser, otherwise a foam-based cleanser will really get the job done and deep clean those pores!
Step #3- Exfoliate
Now it’s time to exfoliate your skin and remove that layer of dead skin cells! You can either choose a physical exfoliant or a chemical exfoliant. Again, I would definitely take into account your skin sensitivity and not choose too strong of an exfoliant if you have very sensitive skin.
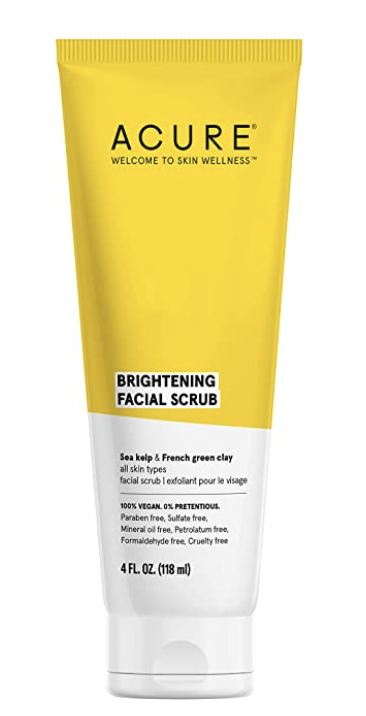
If you want to go the physical route of exfoliation, I recommend using a facial scrub. Just gently massage the exfoliating scrub into the skin for 1-2 minutes and then rinse off with warm water. You don’t want to rub this in too harshly (as tempting as that may be) because we don’t want to damage the skin, just gently exfoliate to slough off the dead skin cells. There is fresh new skin underneath and we need to keep that free from damage!
You may choose a chemical exfoliant instead. Do your research and choose one that isn’t too harsh. And make sure you don’t use a strong chemical or acid peel! You want a mild chemical or acid exfoliant. Leave the chemical peels to the professionals! Trust me, I learned that the hard way when I was trying help reduce my skin discoloration from sun damage and ended up actually making it WORSE. So definitely learn from my mistake!
And a reminder to use EITHER a physical exfoliator OR a chemical one. Never both during the same facial! Be gentle with your skin!

Step #4- Steam
The next step is a facial steam! This will really open up your pores and help the products to penetrate your skin better. You could totally buy a facial steamer and make the process a bit easier (I will list some affordable option below in my list of best at-home facial tools and products). But you could also just fill a bowl with some hot water, put a towel over your head to trap the steam coming off and boom! Free facial steamer.
Make sure you keep your face about 8-12 inches away from the water or steaming apparatus. And I would recommend not going over 10 minutes of steaming. Everyone is different as far as how long they can tolerate, so if after 5 minutes you’re over it, that’s totally fine!
Step #5- Mask up!
Sorry, did that trigger you? I don’t mean your mask you have to wear in public during the pandemic, I mean the much more fun and rejuvenating version of a face mask!
There are SO MANY face masks out there. You got your clay masks, peel off masks, charcoal masks, sheet masks, the list goes on! Plus there are different masks for different skin types and skin issues. How is a girl to choose?
Well. for me I start with what type of mask am I in the mood for? To me there is something so satisfying about the kind that dries and then you peel it off. But if you’re not in the mood for a mess, a sheet mask is way easier to apply and then simply discard afterwards!
Then once you determine what type of mask you prefer, think about the skin issue that bothers you the most. Is it your wrinkles? Acne? Discoloration? Redness? Dryness? There’s a mask for that. Most masks will go into great detail about what skin issues they help fix and most claim to help fix more than one! So it’s pretty easy to find your perfect match!
Keep the face mask on for 15 minutes to 20 minutes (follow the directions on the packaging it comes in, but those are the typical times).
Step #6- (The Final Step!) Moisturizing and Massaging
Yay time to treat your skin to some moisturizer and a relaxing facial massage! If you want to add a serum into the mix first, do that before you apply your moisturizer. Then add your moisturizer of choice (I’ll list some favorites below!).
Next up is your facial massage! If you’re totally clueless on how to give yourself a facial massage, no worries! I put a tutorial video I liked below and it’s totally easy (and watching it will totally make you want to give yourself a facial massage ASAP)! Check it out if you’re wondering the proper technique! (Skip to 2:08 if you want to skip her explanation of the benefits and just watch the actual tutorial!)
You could also use a tool like a facial roller or a gua sha! Below is a video on how to use both tools properly!
The Best At Home Facial Tools And Products
Cleansers
Because you’ll be doing a double cleanse, you’ll need a more oil based cleanser as well as a cream or foam cleanser. Below are some affordable but effective options:
OIL BASED CLEANSERS:
These two options are budget-friendly, effective, hydrating, and highly rated! Both perfect for phase 1 of your double cleanse.


FOAM BASED CLEANSERS:
These two options are budget-friendly, give you a deep clean, and are highly rated! Perfect for phase 2 of your double cleanse.


CREAM BASED CLEANSERS:
These two options are budget-friendly, designed for sensitive skin, highly rated, and also give you a great cleanse! Perfect for phase 2 of your double cleanse if you have sensitive skin.


Exfoliators
As mentioned in the tutorial, you can choose either a physical exfoliant or a chemical exfoliant. I wouldn’t do both in one facial, you want to be nice to your skin! All of these options are affordable, effective, and not too harsh!
PHYSICAL EXFOLIATORS:
These are my picks for physical exfoliators that are effective and affordable. Remember there is no need to do a chemical exfoliator if you’re choosing a physical one!

CHEMICAL EXFOLIATORS:
These two options are very highly rated and will certainly get the job done. The Paula’s Choice one is a little pricier, but comes highly recommended!


Facial Steamer
A facial steamer is NOT necessary. Like I mentioned above, you can just pour hot water into a bowl and put a towel over your head for a DIY / free facial steamer. But if the convenience of having a facial steamer sounds easier and would improve your experience, here is an affordable under $25 option that comes with some other fun things like a plush headband!

Face Masks
There are just SO MANY face masks out there! I love buying the multipacks because then you can address a different skin issue each time you do your facial! These are different kinds I have used and loved in the past! First one listed is a pack of sheet masks, second one is a pack that includes two peel off masks and two clay masks.


Moisturizers & Serums
A good moisturizer is so key for the end stage of your at home facial! Serums are a must-have for me, but they are totally optional. I SWEAR BY the Loreal serum I am listing below (it’s my absolute favorite serum) but if you have super sensitive skin, I would stick to the other serums I am listing. (I am sadly on a hiatus from using my Loreal one because it’s not pregnancy safe but will definitely be using again once my baby girl is born!)
SERUMS:


MOISTURIZERS:


Additional At Home Facial Tools
Ok so if you want to add in any of these at home facial tools, I would recommend only using ONE per facial! These tools are like a bonus and a bit more intense than your average! Again, definitely don’t double up on using any of these in one session because you don’t want to damage your skin!
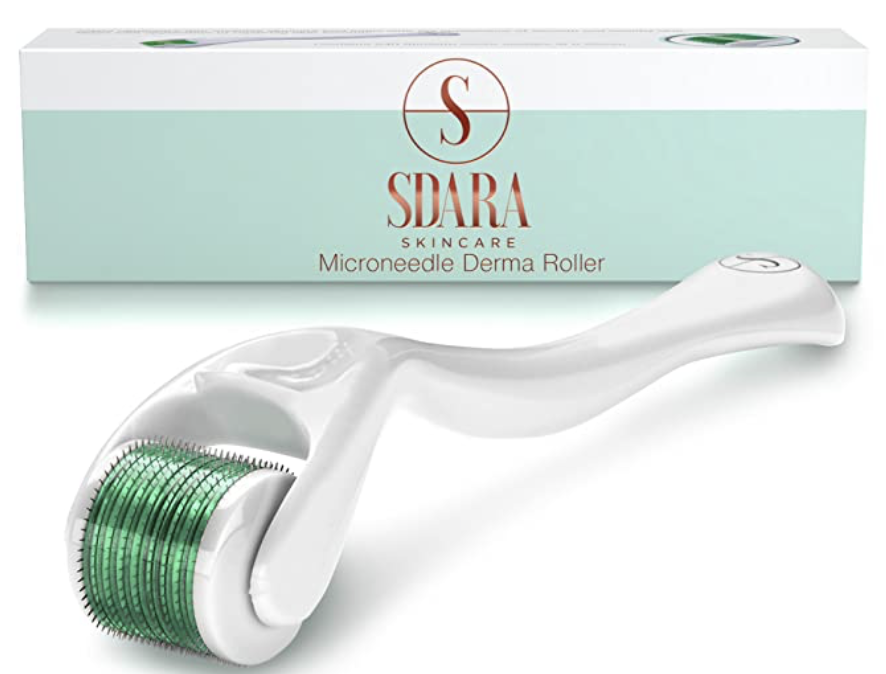
Microneedling Pen
Microneedling is something you can add into your facial rotation if you suffer from acne scars! It uses microneedles to help your serums (namely vitamin C if you’re looking to treat acne scarring) penetrate deeper and work faster.
This affordable and effective option from Amazon has RAVE reviews and tons of before and after photos you can check out (don’t you just love a good before and after photo?)!
If you want to spend a bit more- this microneedling system was rated very highly by Glamour Magazine and is insanely effective! About half the price of a typical in-office microneedling session and it’s yours to keep for multiple uses. So while it’s an investment, it’s still a lot cheaper than going to a professional and it’s literally the next best thing!

Infrared Light Therapy System
This is a great bonus tool to throw in the mix if you struggle with acne! The infrared light is painless and helps to kill bacteria that causes acnes breakouts!
This option is definitely more affordable and you can even grab it at your local Target!

This option is a bit pricier but with rave reviews and amazing before and after photos to check out!

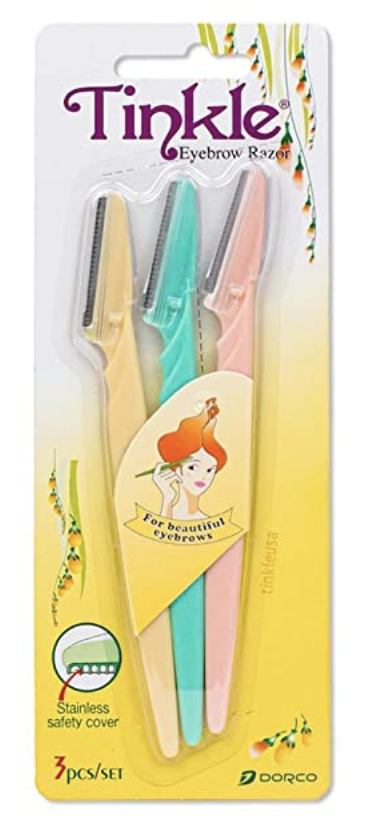
Dermaplaning Tools
Dermaplaning is a deeper type of physical exfoliation that uses a razor- so be very careful and definitely don’t overdo it! It also totally shaves off your peach fuzz but don’t worry, it will grow back the same not thicker!
I use the very affordable Tinkle sticks from Amazon about once per month! They call it an eyebrow razor but it’s 100% effective as a dermaplaning tool too.
But this highly rated at home dermaplaning tool from Ulta is the real deal if you want to splurge on yourself!

I hope this tutorial and list of products and tools for your best at-home facial was helpful! If you love DIY and affordable beauty check out all my recent posts on that topic below!


Get inspired by the prettiest fall chrome nail ideas, from glazed neutrals and rich burgundy to pumpkin spice and chocolate chrome. These trendy autumn nail designs are worth the extra salon charge and perfect for every fall occasion.