
How To Do Your Own Manicure At Home

Today I am going to teach you how to get the PERFECT manicure at home!
After a year of quarantining, I’ve pretty much mastered the at-home manicure! And honestly, I may never go back to the nail salon again! I love a good manicure, and looking down at my pretty painted nails just makes me happy, (something about it, right?!) and if I can achieve the perfect mani without the cost and without moving from my couch, well— why wouldn’t I?
So then I was curious, just how much money am I really saving by skipping the nail salon experience and doing it my myself? Prices vary depending upon where you live, and in good ol New Jersey where I’m from everything’s extra expensive. So let’s put our glasses on get all scientifical (not a word, but fun to say)! AKA let’s look to Google for the answer. According to the website Statista (sounds legit?) the average price for just a regular manicure (not gel’s. acrylics, dip powder etc) is $22.75. Oh, and you gotta tip because… you’re not an A hole! I usually tip $5 for a regular manicure. Typically manicures last about 2 weeks, (and that’s if you’re not a nail biter/picker like me! Thanks to that toxic trait, my manicures tend to have a much shorter shelf life.) so let’s say you visit the nail salon 2x per month. So now you’re spending $55.50 per month on something that you could just DIY! If you stick to doing it yourself, that’s an extra $666 in your pocket each year!
Another reason I love doing my own manicures at home now? I have total freedom and control over how my nails look! I can get as creative as I want without having to awkwardly explain that I’d like to use 5 different colors on my nails please, or be charged extra for adding a design aspect. Plus it’s like a fun new challenge that I can get to take on and try to master! (PS if you love the idea of fun designs on your nails but just know you don’t have the skill set- check out these super easy Press-On Nails I SWEAR by! They come in all sorts of fun designs and all ya gotta do is press them on!)

Need some inspo? Sage green is the hot color this Spring! Check out my list of 20 sage green nail design ideas here!
How To Do Your Own Manicure At Home
You can totally make your DIY manicure part of your “Self-Care Sunday” ritual (or whatever time you have to squeeze in some self-care)! Doing your nails yourself is actually super therapeutic, and a nice way to un-wind that doesn’t involve mindlessly scrolling your Instagram feed.
So today I am going to tell you exactly how to get a salon-quality manicure from the comfort of your own home! Because we fancy and we want the full experience without the full price tag! I encourage you to treat yo’self and do it right! Take some time out of your busy schedule and make this something you look forward to every week! You’ll feel just as pampered as if you just walked out of the salon!
Step 1- Prepare your space and get your tools (see: Essential Manicure Tools below for the full list + links to products I recommend!)
Don’t just grab a bottle of nail polish and plop down on the couch next your husband while he’s eating chips and watching the game. Find a nice quiet and clean space for you to do your nails. Make sure you lay down a paper towel or something on whatever surface you’re using in case you’re clumsy like me and knock stuff over on occasion too! Put on a playlist you love, get into some comfy clothes, light a candle, whatever you gotta do to prep the space for a nice therapeutic experience!

Step 2- Remove your old nail polish with nail polish remover
If you’re working with your bare, natural nails, you can totally skip this step! But if not, make sure you have some cotton balls and nail polish remover handy so you can remove any old nail polish. If you have gels or dip powder nails on you will need 100% acetone and you’ll need to soak the nails in the acetone for at least 10-15 minutes. The easiest method would be to soak cotton balls in the acetone and then using tin foil to keep the cotton balls on your fingers while they soak instead of having to keep your fingers dipped in a bowl of acetone for 15 minutes. Again, this is just for gels or dip powder nails! If you have regular nail polish on you can use a cotton ball and any nail polish remover to quickly remove the polish.
Step 3- Shape your nails
You’ll need a nail file, nail buffer, and nail scissors to properly shape your nails. Your preferred shape depends on your personal preference! I’m more of a square girl myself because my nails are typically pretty short and I think that shape looks best for me! Check out the awesome tutorial below from OPI’s Youtube channel on the most common shapes and how to achieve them. You will need to file and buff your nails, and potentially use the nail scissors to achieve the desired shapes they describe in the video. But it’s not hard, I promise!
Step 4- Push back your cuticles
This step is pretty quick (it’s also totally optional, but if you have short nail beds you might want to do it)! By doing your manicure yourself at home you also get the added benefit of applying the pressure yourself, so no OUCH factor like when you get it done at the salon! You honestly can just use your opposite thumb to do this fo’ free but if you want the full experience you can also buy an orange stick (they come in packs and are super cheap) and gently push the cuticle back. I also recommend adding cuticle oil to make the process easier! Skip the cuticle remover, it can be damaging to your nail health! God gave ya cuticles for a reason (They keep out yeast, fungus, and bacteria)!
BONUS STEP: My blogger bestie (who you should totally follow on the gram! @ChelseaExplains) Is the KWEEN of DIY / at-home manicures and she recommended OPI’s Chip Skip to me in the beginning of quarantine when we were all in a panic about how the heck are we gonna keep our nails looking cute if we can’t visit the salon! It helps makes your regular manicure last SO much longer and I highly recommend you apply it once your nails and cuticles are fully prepped but BEFORE your base coat to prevent chipping!
Step 5- Apply your base coat
I know, eye roll, seems unnecessary BUT the base coat will help prevent discoloration and help the nail polish actually stay on your nails. All things we want. Base coat is quick and easy to apply and it’s clear! Impossible to mess up! 1-2 coats will do the trick!
Step 6- Apply Your Polish!
Your nails are prepped and ready to go! So you can actually start applying polish now. I recommend shaking the bottle before opening to make sure the polish is all mixed together! Sometimes the ingredients in the polish separate, especially if the bottle has been chillin in your bathroom cabinet for a long time! Be sure to apply the polish in THIN layers. You can do multiple coats if it’s a lighter color. Apply as many coats until the color desired is achieved.
Sometimes things get sloppy, I mean we’re not professional nail techs after all! Definitely have your nail polish remover and a cotton ball handy for any excess polish that end up on your fingers instead of your nails. They actually sell special polish barrier stickers on Amazon that can help you avoid any excess polish and help you paint your nails with confidence!

Step 7- Finish It Off With A Top Coat
Another seemingly pointless step but if you want salon-level nails you gotta do the top coat! It will further prevent chipping and scratching and you can get a shinier finish. Or you can even buy a matte top coat if you prefer that look (I personally loooove a matte finish)! Some top coats even help your nails dry faster! Make sure you cover the edges and tips to ensure everything is locked in where you’re the most likely to start chipping!
Step 8- Let Your Nails FULLY Dry
I can’t tell you how many manicures I have ruined by not being patient and using my hands for something before my nails are fully dried! Trust me, you put in all this work, you definitely don’t want to mess it all up now! If you’re super impatient you can buy top coats or drops that help to speed up the drying time! Or you could just do it the old fashioned way and just BLOW!
Essential Manicure Tools
All the steps above require certain tools to accomplish! This will be a small upfront investment if you don’t already own most of these things, but it is certainly less than the cost of repeatedly going back to the salon every 2 weeks!
If you don’t have most of the tools I mention and want to just “one and done” it- there are manicure sets you can purchase! This is an easy way to just get everything you need in one go and usually it ends up being cheaper because it’s sold in a set instead of separately!
You can purchase this set from Amazon which is super affordable and has all of the tools you need (aside from polish, base coat, top coat, polish remover)

Here is the list of ALL the tools I recommend if you’d like to purchase separately (descriptions/links below) :
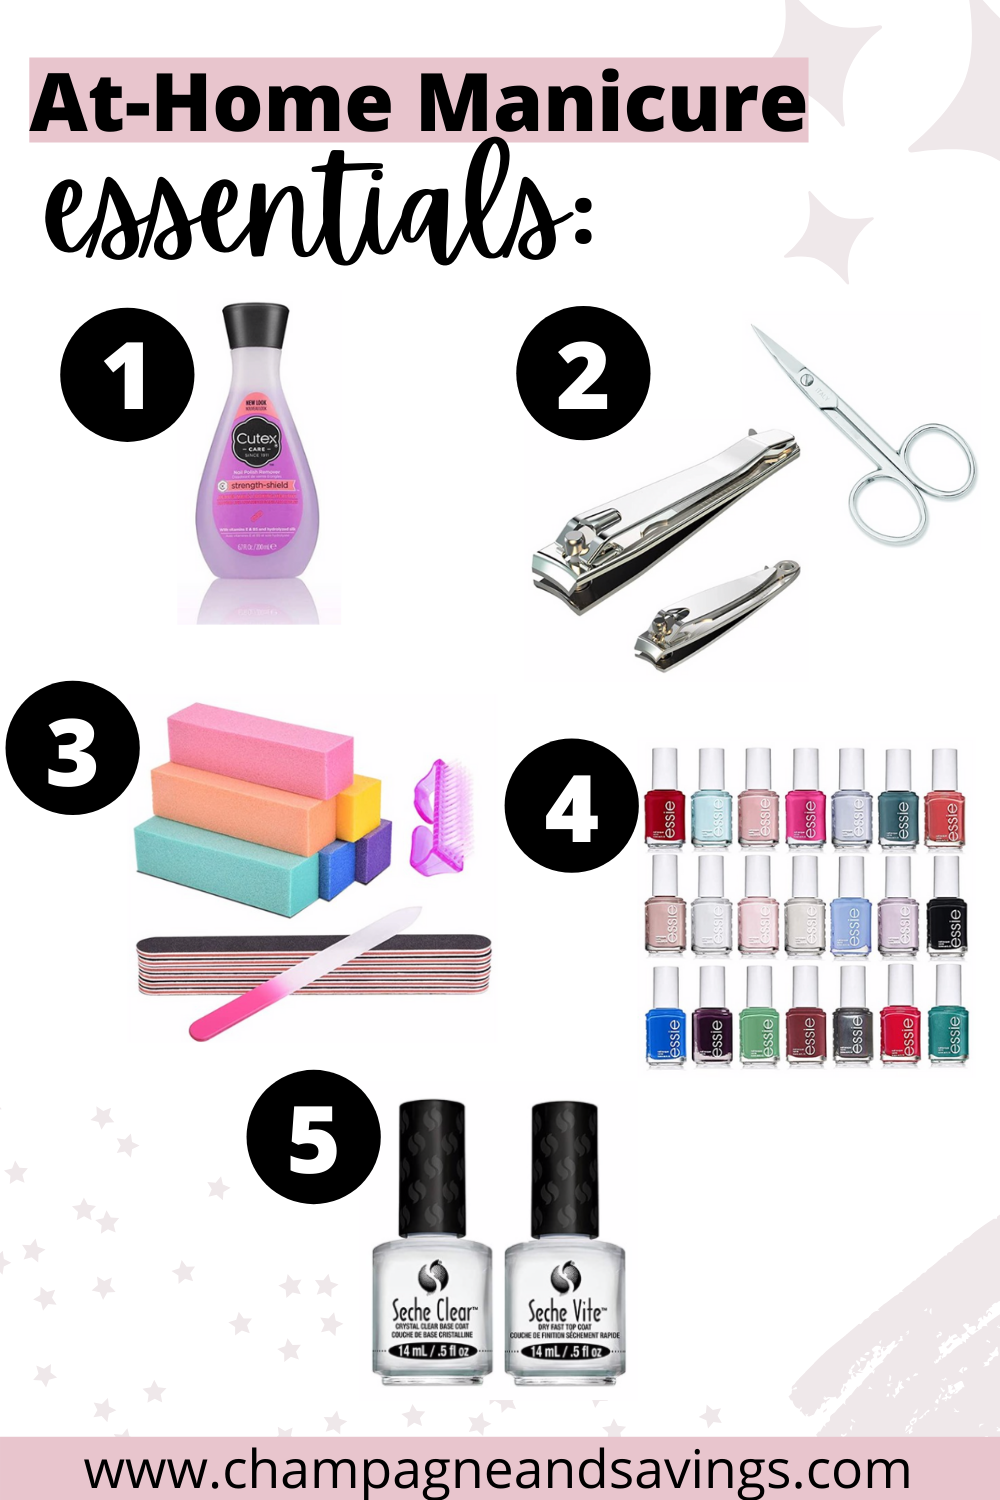
1) Nail polish remover:
You’re definitely going to want this if you plan on doing your nails at home! Good for removing any mistakes or just removing previous nail polish when you’re ready to re-do your mani.
2) Nail scissor or clippers:
Another very useful tool in helping to shape your nails and making sure they all look uniform. I’m more of a nail scissors kinda girl, but nail clippers work too! Make sure to clean them regularly by wiping off any debris, washing with soap and water, and then disinfecting with rubbing alcohol,
3) Nail Files & Buffers:
You definitely want a good nail file and buffer for helping to really shape and smooth the nail! Again, make sure you clean these tools regularly!
4) Nail Polish:
The most fun part to purchase! My favorite brands are Essie, OPI, and Sally Hansen! Make sure not to buy gel polish because that is specifically for gel nails which require a UV lamp! (You can totally do this yourself too but we’ll save that tutorial for another blog post!)
5) Base & Top Coats:
Purchase these in a set and save! Essential for ensuring the color of your polish doesn’t fade and to help your manicure last as long as a salon quality manicure would!
Here is a list of bonus items that are just “nice to have” but you certainly don’t need to get a great manicure (descriptions/links below)!
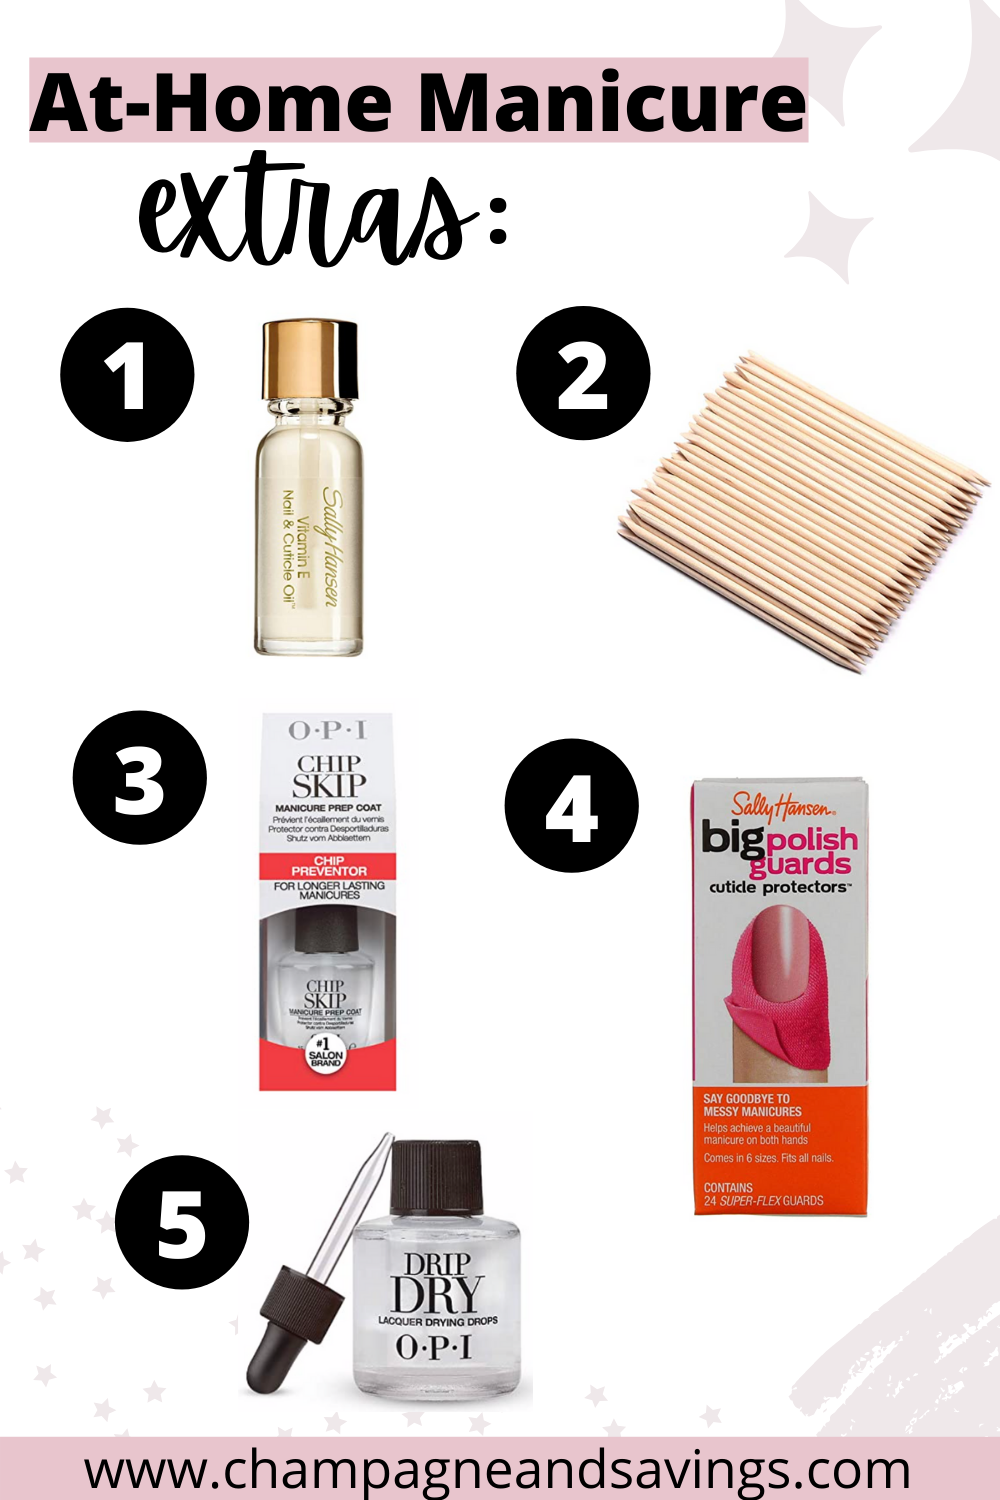
1) Cuticle Oil:
This will help keep your cuticle nice and hydrated and soft! Makes them easier to push down and less likely to dry out/ peel.
2) Orange Sticks:
This is just the special tool that pushes your cuticles down. Nice to have but like I mentioned you could just use your opposite thumb nail and get the same effect. They are not meant to re-use so be sure to throw them out after one use. Otherwise they might harbor some unwanted bacteria and other germs that you don’t want to be using on your cuticles!
3) Chip Skip:
If you buy any of the “nice to have” things, I definitely recommend this one! Will help you avoid chipping and help your mani last that much longer!
4) Polish Barrier Stickers:
For those of us that are far from expert nail polish appliers! Just takes the stress out of it and makes it almost impossible to mess up!
5) Nail Polish Drying Drops:
A great purchase for the impatient or pressed for time girl! Just add a few drops to speed up the drying process!
I hope you found this blog post helpful and that you enjoy your at-home manicure experience! I think it’s a great skill to have (especially in quarantine!) and a great way to do some primping and self-care on the cheap! If you loved this post, be sure to check out my other at home beauty-related posts here:
Why MineTan is the Best At-Home Self Tanner
The Best Beach Wave Curling Iron / Wand
Happy Shopping!
